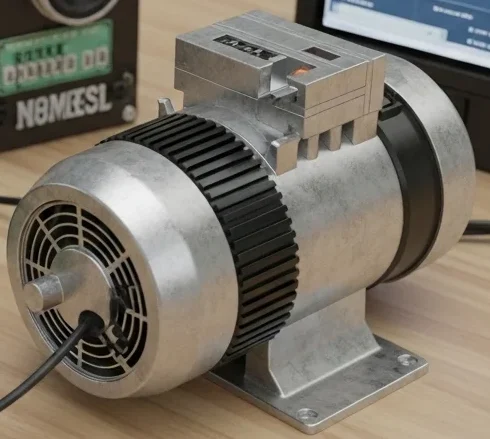

Ask an electrician the single most important test on a motor, cable or transformer, and most will answer: the insulation resistance test. And the instrument that performs it has become so famous that its brand name turned into the test itself — the Megger. Technicians say “megger the motor” the way people say “xerox the document.”
This guide explains what a Megger is, how it works inside, the types available today, and exactly how to test insulation resistance step by step — including what the readings mean and the safety rules you must never skip.
What Is a Megger?
A Megger is a portable instrument that measures insulation resistance — the resistance of the insulating material separating live conductors from each other and from earth. Good insulation has enormously high resistance (hundreds or thousands of megohms); damaged, damp or aged insulation shows low resistance, warning you before it becomes a short circuit, an electric shock or a fire.
Technically the instrument is a megohmmeter, and “Megger” is the trademark of the Megger Group, in use since the early 1900s. What makes it special is its test voltage: instead of the few volts a multimeter uses, a Megger applies 250, 500 or 1000 volts DC (higher for HV equipment), stressing the insulation the way real operating voltage does. A multimeter simply cannot reveal insulation weakness — which is why every serious electrical testing toolkit includes a Megger alongside the digital multimeter.
Megger Working Principle
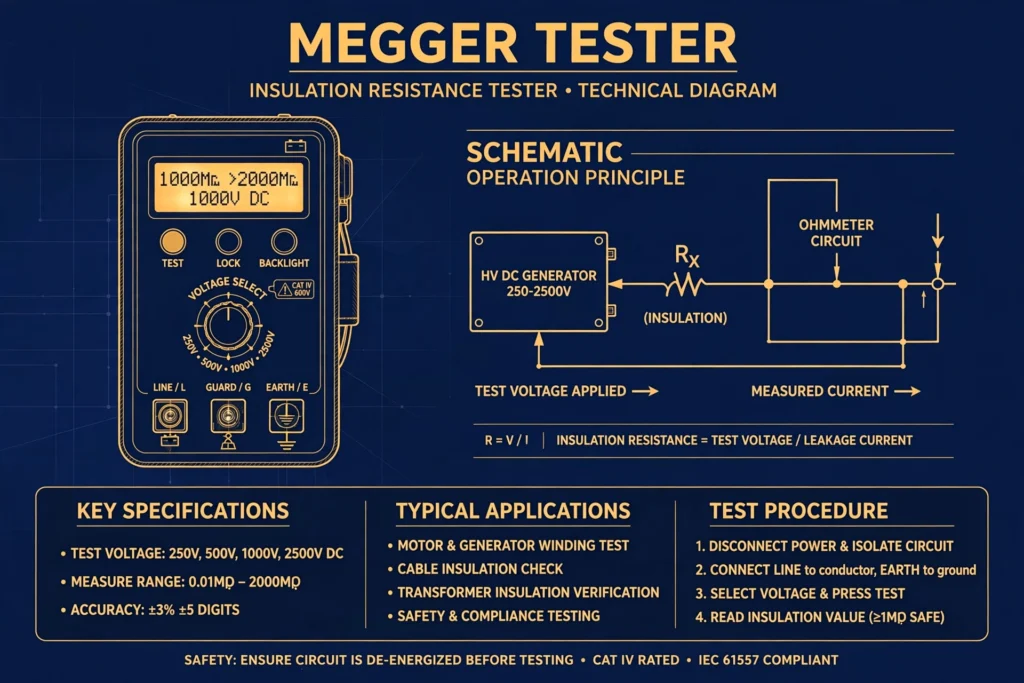
A classic hand-cranked Megger combines two things in one box: a small DC generator and a sensitive ohmmeter movement.
- Voltage generation: turning the crank spins a small hand-driven DC generator (or, in modern units, an electronic inverter boosts a battery) producing a stable test voltage of 500 V or 1000 V DC.
- Current through insulation: this voltage is applied across the insulation under test. A tiny leakage current flows through the insulation — microamps or less for healthy insulation.
- Ratio measurement: the moving-coil meter measures the ratio of applied voltage to leakage current. By Ohm’s law (R = V/I), the pointer deflects directly in megohms. Because it is a ratio measurement, the reading stays steady even if your cranking speed varies slightly.
- Guard terminal: a third terminal intercepts surface leakage currents (moisture or dirt on the surface) so they do not corrupt the measurement of the insulation’s true internal resistance.
In short: the Megger forces a high DC voltage across insulation and measures how little current leaks through — less leakage means healthier insulation.
Main Parts of a Megger
- Hand crank or battery/inverter: the high-voltage source.
- Moving-coil meter: calibrated directly in megohms (and often kilohms on a second scale).
- Line terminal (L): connects to the conductor under test.
- Earth terminal (E): connects to earth or the equipment frame.
- Guard terminal (G): bypasses surface leakage for accurate readings.
- Test leads: heavily insulated leads rated for the test voltage.
Types of Meggers
1. Hand-operated (crank) Megger: the traditional type — no battery needed, works anywhere, but cranking for a full 60-second test is tiring and the voltage depends on steady cranking.
2. Motor/battery-operated Megger: an internal motor spins the generator at constant speed, giving steadier voltage with less effort.
3. Digital (electronic) Megger: the modern standard — battery-powered inverter generates the test voltage, and a digital display shows the reading, often with automatic features like polarization index (PI) and dielectric absorption ratio (DAR) calculations, data storage and Bluetooth.
For field work today, a digital insulation tester is the practical choice; the crank type survives mainly as a rugged backup. Whichever you use, keep it calibrated — a tester that reads high is worse than no tester at all.
How to Test Insulation Resistance: Step by Step
Testing a motor (winding to earth):
- Isolate the motor completely — switch off, lock out, and verify dead with a voltage tester.
- Disconnect the supply cables from the motor terminals so you test the motor, not the whole circuit.
- Clean the terminals; dirt and moisture cause false low readings.
- Connect the Megger’s Earth (E) lead to the motor frame and the Line (L) lead to one winding terminal.
- Select 500 V (for LV motors) or 1000 V (for larger motors, per manufacturer guidance).
- Crank or press TEST and hold for 60 seconds. Note the reading at 15 seconds, 30 seconds and 60 seconds.
- Repeat for each winding.
- After the test, discharge the winding to earth with an insulated discharge rod — windings store charge like capacitors.
Testing a cable (core to earth / core to core): same procedure, testing each core against earth and against the other cores, with the far end left disconnected.
Understanding the Readings
| Reading | Meaning | Action |
|---|---|---|
| Above 100 MΩ | Excellent insulation | Fit for service |
| 10 – 100 MΩ | Good | Normal; trend over time |
| 2 – 10 MΩ | Doubtful, possibly damp or aging | Dry out, retest; investigate |
| Below 2 MΩ (LV equipment) | Poor insulation | Do not energize; repair or replace |
| Near zero | Shorted or completely failed | Equipment faulty — do not use |
Two advanced ratios from the timed readings: the dielectric absorption ratio (DAR) = 60-sec reading ÷ 30-sec reading (good if above 1.4), and the polarization index (PI) = 10-min reading ÷ 1-min reading (good if above 2.0). Rising readings over time indicate healthy, dry insulation; flat or falling readings spell trouble. Always compare against the equipment’s previous test history — the trend matters more than any single number.
Safety Precautions
- Never megger equipment that is energized or connected to the supply.
- Disconnect electronic components (VFDs, soft starters, surge protectors) — 1000 V will destroy them.
- Discharge the tested winding or cable to earth after every test; capacitive charge can give a nasty shock.
- Keep one hand in your pocket and stand on dry insulation where possible.
- Warn others nearby — the test voltage appears on exposed terminals.
- Do not megger in explosive atmospheres unless the instrument is rated for it.
Megger vs Multimeter
| Feature | Megger | Multimeter |
|---|---|---|
| Test voltage | 250–5000 V DC | A few volts |
| Measures | Insulation resistance (MΩ–GΩ) | Voltage, current, low resistance, continuity |
| Finds weak insulation? | Yes — stresses insulation realistically | No — voltage too low to reveal faults |
| Use on live circuits? | Never | Yes (its main job) |
FAQs
What is a Megger used for?
Testing insulation resistance of motors, cables, transformers, switchgear and wiring — verifying that insulation separating live parts from earth and from each other is healthy before energizing equipment.
What is the difference between a Megger and a megohmmeter?
Nothing technical — “Megger” is the brand name that became the generic term, like Xerox for photocopying. A megohmmeter is the generic instrument name.
What voltage should I select on a Megger?
Match it to the equipment rating: 250 V for low-voltage control circuits, 500 V for 230/400 V equipment, 1000 V for larger LV motors and cables, and 2500–5000 V for HV equipment. When in doubt, follow the manufacturer or the relevant standard (such as IEEE 43 for rotating machines).
Why do Megger readings change with time?
Insulation absorbs charge like a capacitor (dielectric absorption), so the apparent resistance rises during the first minutes. That is why standard tests record readings at fixed times and compute PI and DAR ratios.
Can I megger a VFD or soft starter?
No — disconnect all electronic devices first. Megger test voltage will puncture their semiconductors. Test the motor and cables with the drive disconnected.
How often should insulation testing be done?
Critical motors and HV equipment: annually or per the plant’s electrical maintenance checklist. After floods, long shutdowns, or any overheating event: test before re-energizing.
Conclusion
The Megger does one job and does it brilliantly: it applies a realistic high voltage to insulation and tells you, in megohms, whether that insulation can still be trusted. Learn its working principle, follow the test procedure carefully, respect the safety rules, and trend your readings over time. Few instruments repay their small cost as generously — a two-minute Megger test has prevented countless motor burnouts, cable faults and electrical fires.
Further reading: Megohmmeter — Wikipedia.